To create PowerShell scheduled task it is convenient since you can leverage the PowerShell features in order to create, modify, and delete scheduled tasks with commands, and in this guide, we’ll show you how to complete these tasks.
The graphic interface of Taskschd.msc console is used to create Windows Task Scheduler jobs. The Task Scheduler is a useful tool that has been around for several years, and it provides a friendly graphical interface to create automated routines. By using this tool, you can automate tasks to launch applications, run specific commands, or execute scripts at a selected schedule or once a condition is met. As a sysadmin you can also use PowerShell to schedule, modify, and delete tasks, which can come in handy when you need to streamlined the process of creating tasks on several devices or when you need to create a PowerShell script that needs to interact with the console.
What is a PowerShell scheduled task?
Often, system admins, engineers, or developers might need to deploy a lot of difficult tasks with multiple schedules, triggers, or arguments. Here comes in help Scheduled tasks. They perform repeatable action in an automated way using ScheduledTasks module that’s built-in to Windows. PowerShell can be used to form and manage scheduled tasks.
The advantage of creating a scheduled task with PowerShell is that you’ll be able to build one from the simplest to the most complex using different triggers and configurations. Once you are developing these automation scripts, you’ll be able to facilitate the whole process. PowerShell helps standardize the process and has the additional benefit of avoiding the same old errors that stem from manual entry.
PowerShell scheduled task requirements
Below are the requirements to create scheduled tasks using PowerShell:
- In our examples, in this article, we will use Windows 10. But Windows Server 2012 and newer versions can do the same.
- Windows PowerShell 5.1 or PowerShell 7.
- Script editor such as Visual Studio Code, Notepad++, or Windows PowerShell ISE.
Before starting you need to understand a brief explanation for each scheduled task component below:
- Action – the action that is executed by the scheduled task. Action is typically to run a program or a script. A scheduled task can have more than one action.
- Trigger – controls when the scheduled task runs. Triggers can be time-based, like, setting a schedule for daily or hourly recurrence. Triggers can also be activity-based, which runs a task based on detected activities like computer startup, a user logs in, or logged events.
- Principal – controls the security context used to run the scheduled task. Among other things, a principal includes the user account and the required privilege used by the scheduled task.
- Settings – is a set of options and conditions that controls how the scheduled task behavior. As an example, you can customize a task to get removed after a consecutive number of days that the task is unused.
Note: During a scheduled task creation, the principal and settings are not explicitly required. The default values get used instead.
How to create a scheduled task with PowerShell on Windows 10
To create PowerShell scheduled tasks on Windows 10, use these steps:
- Open Start.
- Search for PowerShell, right-click the top result, and select the Run as administrator option.
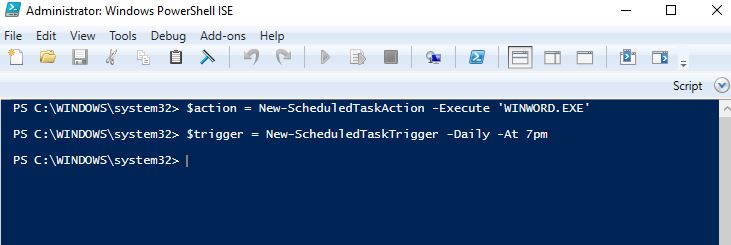
- Type the following commands to create a variable to store the action of the task and press Enter. In the command, make sure to replace ‘PROGRAM’ with the name of the program you want to start. The “$action” is a variable, and it does not matter the name as long as you keep it short, simple, and descriptive. For example, this command tells Task Scheduler to start the Microsoft Word app:$action = New-ScheduledTaskAction -Execute ‘WINWORD.EXE’

Create PowerShell scheduled tasks
- Type the following command to create a variable that stores the schedule information for the task and press Enter. In the command, make sure to replace SETTING and TIME with the details on when you want to run the task. The $trigger is a variable, and it does not matter the name. For example, this example tells Task Scheduler to run the task daily at 7 pm:
$trigger = New-ScheduledTaskTrigger -Daily -At 7pm
- In the command, make sure to update “TASK-NAME” with the task’s actual name and “OPTIONAL-DESCRIPTION-TEXT” with the description of the task. The folder “-TaskPath” option is not a requirement, but it will help keep tasks separate. If you do not specify the option with a path, the task will be created inside the Task Scheduler Library folder. For example, this command creates as a scheduled task with the “testTask” name, custom description, and with settings specified on steps No. 3 and 4:
Register-ScheduledTask -Action $action -Trigger $trigger -TaskPath "MyTasks" -TaskName "testTask" -Description "This task opens the Word"
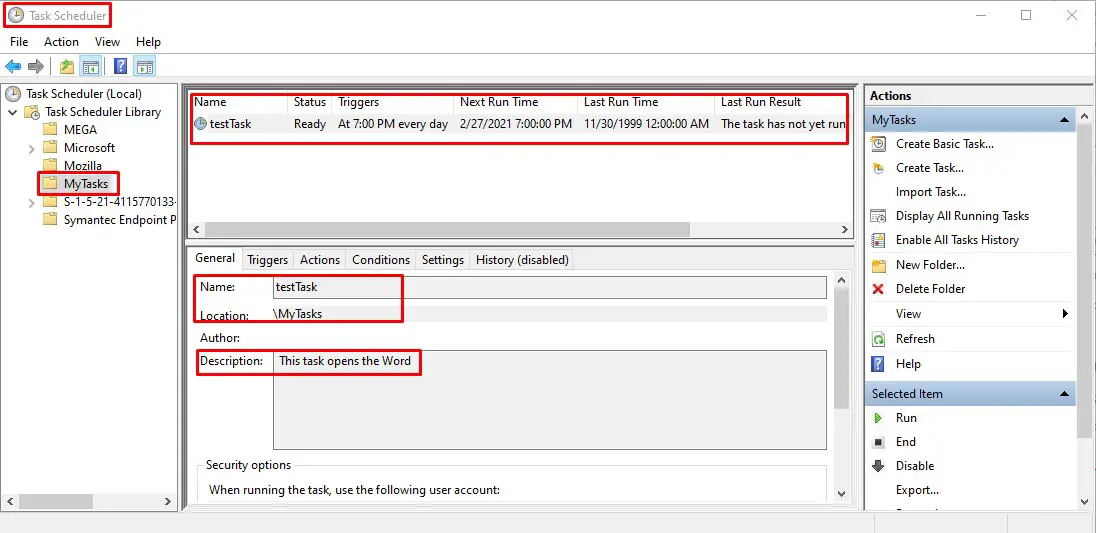
Once the steps are completed, the task is created and scheduled according to your configuration. You can check the created task on your Taskschd.msc console:
- Open Start.
- Search for TaskScheduler, right-click the top result, and select the Run as administrator option.
- Navigate using the left panel to MyTasks
How to delete scheduled task using PowerShell
To delete a scheduled task from the Task Scheduler with PowerShell, use these steps:
- 1.Open Start.
- Search for PowerShell, right-click the top result, and select the Run as administrator option. Type the following command to confirm the task exists and press Enter:
Get-ScheduledTask -TaskName "TAKS-NAME"
- In the command, make sure to replace “TAKS-NAME” with the name of the task. For example, this command shows the testTask task that we already created on the previous step:
Get-ScheduledTask -TaskName "testTask"
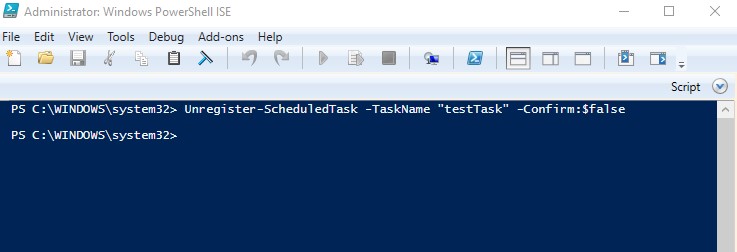
- Type the following command to delete the scheduled task and press Enter. In the command, make sure to replace “TAKS-NAME” with the name of the task. The “-Confirm:$false” option deletes the task without asking for confirmation. For example, this command deletes the testTask task that we already created on the previous step::
Unregister-ScheduledTask -TaskName "testTask" -Confirm:$false
Create PowerShell scheduled tasks tips
- For “SETTING,” you can use -Once, -Daily, -Weekly, or -Monthly. And for the time, you can use the 12 or 24-hour format. If you are using the “Weekly” option, then you also provide the “-DaysInterval” or “-DaysOfWeek” information followed by the corresponding information. Type the following command to create the scheduled task using the variables you specified on the previous steps and press Enter:
Register-ScheduledTask -Action $action -Trigger $trigger -TaskPath "TASK-FOLDER" -TaskName "TASK-NAME" -Description "OPTIONAL-DESCRIPTION-TEXT"
- 2.If you are trying to schedule a Command Prompt or PowerShell script, you will use the name of the program for the “-Execute” option and “-Argument” option to specify the path of the script. For example:
$action = New-ScheduledTaskAction -Execute 'cmd.exe' -Argument C:\scripts\myscript.bat
Conclusions
This guide focuses on the fundamental steps to start out managing scheduled tasks with PowerShell. The scheduled Tasks feature in Windows is a wonderful tool for fixing tasks or jobs. You’ll produce the foremost basic to additional complicated tasks. However, with PowerShell commands, you’ll manage several alternative settings such as delete and alter scheduled tasks. As you’ll see, it’s easy to make a scheduled task with PowerShell. however keep in mind that improper changes to your scheduled tasks will cause service interruptions and degrade computer performance. Therefore, it’s essential to trace all changes to your scheduled tasks.
