Out of all issues a Windows user encounters daily, the page_fault_in_nonpaged_area BSoD error is the most annoying. Though it is very common, you really cannot predict when the unpaged error will make its way to your PC.
Fortunately, there are ample ways to fix the error. The only condition – you must be aware of what is causing it!
So, here is the complete guide to help you out. Continue reading to know what contributes to the page_fault_in_nonpaged_area on Windows 10 and its possible fixes.
Reasons of page_fault_in_nonpaged_area BSoD
The page_fault_in_nonpaged_area is one of the 500 Blue Screen of Death (BSoD) errors that frequently appears on Windows 11/10/7. It is an area of RAM that contains the most important information for the system’s operation.
If you encounter the blue screen page_fault_in_nonpaged_area error, it means that your system is unable to detect this information from the memory. As a result, the system does not operate and displays the error code.
Besides, there are several other reasons behind the above error code. These are:
- The system has a corrupt NTFS (New Technology File System) volume.
- There are false driver codes or wrong system services installed on the system.
- An antivirus is declining the OS from accessing the nonpaged data.
- The Windows is unable to access the data from the nonpaged area.
- There are some major hardware problems with the system. As a result, you get the 0x00000050 error.
These are the other factors that lead to the page_fault_in_nonpaged_area on Windows 7 and higher versions.
How to fix page_fault_in_nonpaged_area on Windows 10?
Once you have determined what causes the page_fault_in_nonpaged_area on Windows 10, you must act immediately to solve the error and make your OS work properly.
These are the best solutions to fix the nonpaged error code on your computer. So, let us go through each in detail.
1. Try hardware troubleshooting
Troubleshooting the hardware solves most of the PC problems such as:
- You encounter the BSoD/CMOS error
- The PC is not turning on
- Your computer turns on, yet does not work
- The system can not detect the hard drive
Hence, follow these steps to solve the page_fault_in_nonpaged_area on Windows 10 through troubleshooting.
- Head to the Settings
- Click on the Windows & Security
- On the left sidebar, click on the Troubleshoot option to access your recently used troubleshooters, if any.
- If you have not used any troubleshooters so far, you can get the available troubleshooters from the Additional Troubleshooters
- Next, click on Run the troubleshooter button to begin the process.
If prompted, follow the on-screen instructions to guide the troubleshooter. The process may take a while to complete since it will first scan the issue and fix it automatically.
2. Check your disk for error
You must check your hard disk for potential bugs or errors regularly. However, if you do not, it might be the cause of the page_fault_in_nonpaged_area error code.
Do not worry!
There is a very useful tool called Check Disk (CHKDSK). It uses a multipass scanning mechanism to check the functioning of your hard disks. For best results, run the tool every month or as per requirements.
To use the CHKDSK tool, follow these steps.
- Open the Command Prompt as an admin on your computer. You can do so through the start menu. Alternatively, open the Task Bar, hold on File, and click on Run New Task. This will automatically open the command prompt with administrative permissions.
- Input the chkdsk f/r/x/ command on the command prompt and hit the Enter
- The command will be executed immediately and scan the computer for errors and fix them if any.
Note that the process may take several minutes depending upon the computer’s condition. Once completed, check if the nonpaged error persists.
Apart from the Check Disk tool, you can also run the SFC (system file check) tool to scan for issues.
Follow the above steps till opening the Command Prompt. Once you are there, enter the command – sfc /scannow and hit the Enter button.
The SFC tool will now scan for all potential issues in your system and solve them simultaneously.
For your information: The basic difference between Check Disk and System File Check is that the former scans only the selected hard drive. However, all corrupt files are scanned by the SFC tool.
If so, work around the next method.
3. Run Windows Memory Diagnostic Tool
Another solution you can try to solve the nonpaged error is running a Windows memory diagnostic tool. Though there are tons of third-party software to use, I recommend Windows built-in tools only due to compatibility issues.
All modern versions of Windows are equipped with a diagnostic tool. It writes data on your computer’s RAM and reads it back. If the tool reads a unique value than what it wrote, it signifies a faulty RAM.
To run your Windows memory diagnostic tool, follow these steps.
- Open the Search box, enter Windows Memory Diagnostic, and click on the first option that shows up. Alternatively, open the Command Prompt and execute the mdsched.exe command to open the tool.
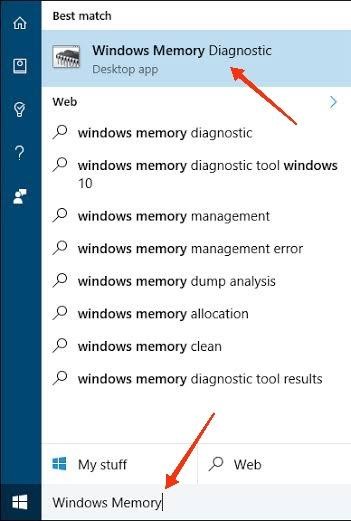
mdsched.exe
- Once the tool opens click on the Restart now and check for problems option to allow the tool to access your PC now.
Once done, the tool will take over and restart your computer. It will examine the system thoroughly in the process and that is why it may take several minutes.
Note: Before running any diagnostic tool, always backup your valuable data to avoid any loss.
The tool will automatically reboot your PC after performing the diagnosis and return with the results. This happens in 99% of cases and if you fall in the remaining 1%, here are the steps to get the results.
- Open the Event Viewer desktop app which can be opened in two ways. First, enter the Event Viewer in the search box and press Enter. Or, execute the msc command in the Run box.
- This will open the Event Viewer app.
- Click on the Windows Logs option on the left side pane to expand it. Click on System. The System drop-down menu will open.
- Click on Find.
- Enter MemoryDiagnostic in the input field and hit the Enter key.
You will get the entire results of the diagnostic tools scanning process.
4. Check your memory
As aforementioned, both the CPU and RAM play an important role behind the page_fault_in_nonpaged_area on Windows 10 or even Windows 11/7. Hence, the condition of both needs to be perfect for the safe operation of your system.
In case of any problem, the nonpaged error becomes inevitable. In most cases, the RAM stick is the main culprit. It is sometimes broken or does not fit properly in the motherboard.
In such situations, you should either buy a new memory stick or push back the existing stick in its correct place. You must further ensure the compatibility of the memory sticks with the motherboard.
Here is the summary of the above in quick points.
- Shut off your computer completely, remove the battery, and power cords if any.
- Take out the RAM stick. Evaluate it for any dust accumulated over it or damage. If the latter, I recommend buying a new stick.
- If the stick is not fitting in tightly in the slot, check the issue and solve it. Make sure the RAM stick sits firmly at its designated slot.
Restart your computer and check if the nonpaged error shows up. If so, try the next method.
5. Disable fast startup (or hybrid sleep in Windows 7)
Have you enabled fast startup on your PC? If so, that is another reason behind the page_fault_in_nonpaged_area BSoD error. While the feature lets your computer start quickly, it affects the RAM.
Hence, you should disable the fast startup feature. Follow these steps to do so.
Note: You must be the system’s administrator to carry out the steps.
- Open the Search box, enter Power options, and press the Enter
- Click on Choose what the power buttons do.
- Under the Shutdown settings, you have four options – turn on fast startup, sleep, hibernate, and lock.
- Click on the checkbox adjacent to the Turn on fast startup

Turn on fast startup
- Click on Save changes.
This should solve the nonpaged error on your Windows 10. If not, try the next solution.
6. Uninstall, rollback, or update your device driver(s)
Your device drivers get outdated, corrupt, or damaged over time. If not looked at immediately, you can not avoid the BSoD errors.
Here is what you can do with the device drivers to solve the problem.
● Uninstall device drivers
Follow these steps to uninstall device drivers on Windows 10.
- Use the shortcut key combination Windows + R to open the Run window and execute the msc command to open the Device Manager.
- Navigate to the Display Adapters option and click on it to expand it.
- Right-click on the device driver(s) and select the uninstall device option from the drop-down menu that appears.
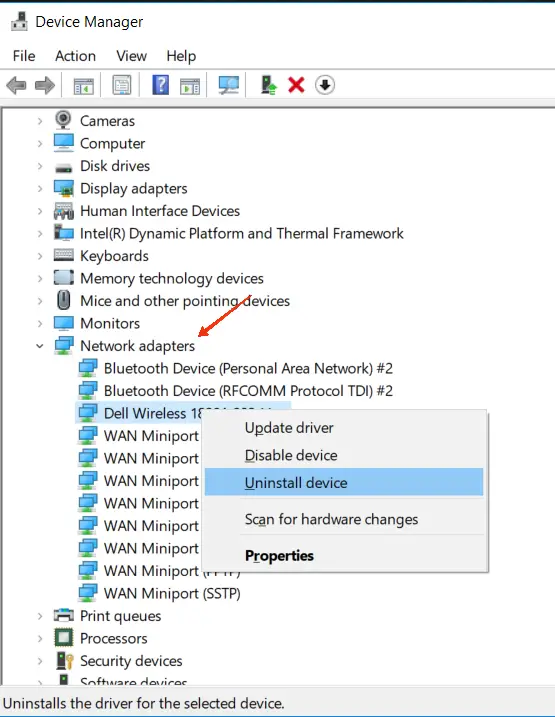
uninstall device
- On the next screen, click on the Uninstall.
- Restart the system to apply the changes.
● Rollback device drivers
Follow these steps to roll back device drivers on Windows 10.
- Open the Control Panel of your PC.
- Navigate to the Hardware & Sound
- Click on Device Manager.
- Once the Device Manager console is open, find the Display Adapters option and click on it to expand it.
- Right-click on the device driver(s) and select the Properties option from the drop-down menu that appears.
- Under the Properties window, click on the Driver
- Click on the Roll Back driver
- Follow the on-screen instructions to roll back the selected driver back to its earlier version.
Once done, restart your computer to see the changes.
● Update device drivers
Follow these steps to update device drivers on Windows 10.
- Search for Device Manager in the search box and press the Enter key to open the console.
- Navigate to the Display Adapters option and click on it to expand it.
- Right-click on the device driver(s) and select the Update driver option from the drop-down menu that appears.
- On the next screen, click on the Search automatically for updated driver software.
- Restart the system to apply the changes.
If nothing of the above works for you, I recommend disabling the automatic paging file management as discussed below.
7. Increase Virtual Memory/Disable Automatic Paging File Size Management
Since the page_fault_in_nonpaged_area error is related to your computer’s memory, users have also resolved the issue by increasing their system’s virtual memory.
Hence, you can also work around this. To increase virtual memory, follow these steps.
- Go to the Settings
- In the search box on the left-hand side, enter Performance and click on the magnifying glass icon.
- In the new window that opens, click on the Advanced Select Virtual Memory.
- The Virtual Memory window will open.
- You will see the Automatically manage paging file size for all drives option at the top. Click on it to uncheck it.
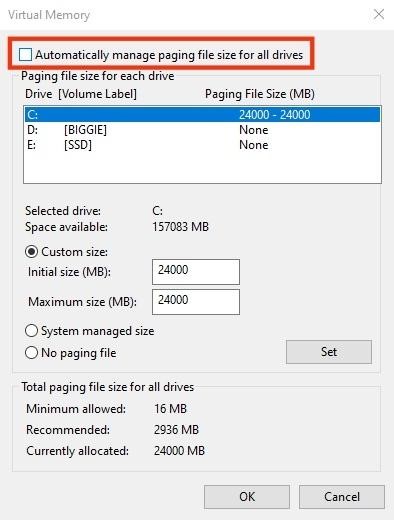
Automatically manage paging file size for all drives
- Click on Custom size and enter the memory size values.
- Click on Set to set the memory size values and click on Ok to apply the changes.
Restart your system. Check if the previous nonpaged error persists. If yes, try out the following solution.
8. Disable non-Microsoft services to fix the page_fault_in_nonpaged_area issue
Another great means to solve the page_fault_in_nonpaged_area is disabling all non-Microsoft services and programs on your Windows 10.
To do so, follow these steps.
- Open the Command Prompt via the Windows + R shortcut key combination.
- Execute the command – msconfig in the prompt. This command will take you to the System Configuration
- As the System Configuration utility opens up, go to the Services
- Scroll down to the Hide all Microsoft services option and click on it.
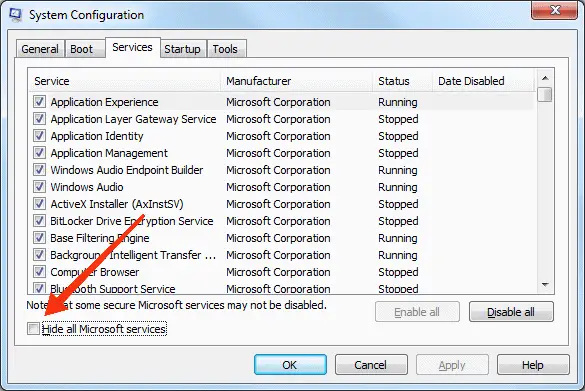
Hide all Microsoft services
- Click on Ok to finish the process.
Restart your computer to see the changes. Now, check if the nonpaged error still shows up or not.
9. Run Windows Updates
If none of the above methods work for you, you may be running outdated Windows on your PC. Conducting a quick Windows update should be done frequently. It removes the existing bugs and solves other common issues you might be encountering but are unable to manage.
Not to forget the latest security patch!
To update your Windows 10 to the latest build, follow these steps.
- Go to the Settings page of your system.
- Look for the Update & Security option and click on it. It is usually the last option on the panel.
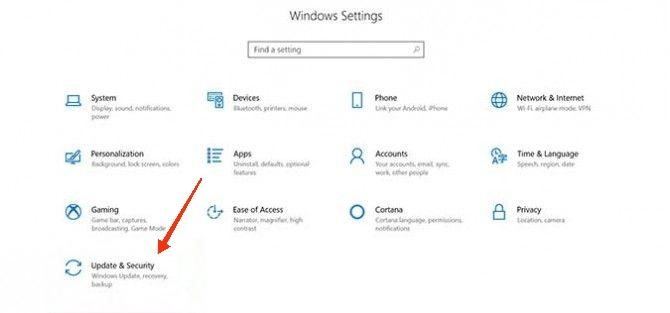
Update & Security
- On the left sidebar, click on the Windows Update
- Next click on Check for updates. If there will be any update available, it will be automatically downloaded.
If you cannot install the update due to any reason, you can also schedule the update for later. For this, click on Advanced options and follow the on-screen steps.
10. Turn off your antivirus software
Have you recently installed antivirus software on your PC? If so, its real-time protection settings might be the cause of the page_fault_in_nonpaged_area error in Windows 10.
You should either disable the Windows Defender or uninstall the antivirus.
Follow the given steps to do so.
- Open the Settings on your PC.
- Look for the Updates & Security option and click on it.
- Click on Windows Security on the next screen.
- Click on Virus & threat protection and you will be taken to the Virus & threat protection settings
- Select the first option, i.e., Real-time protection to turn it OFF.
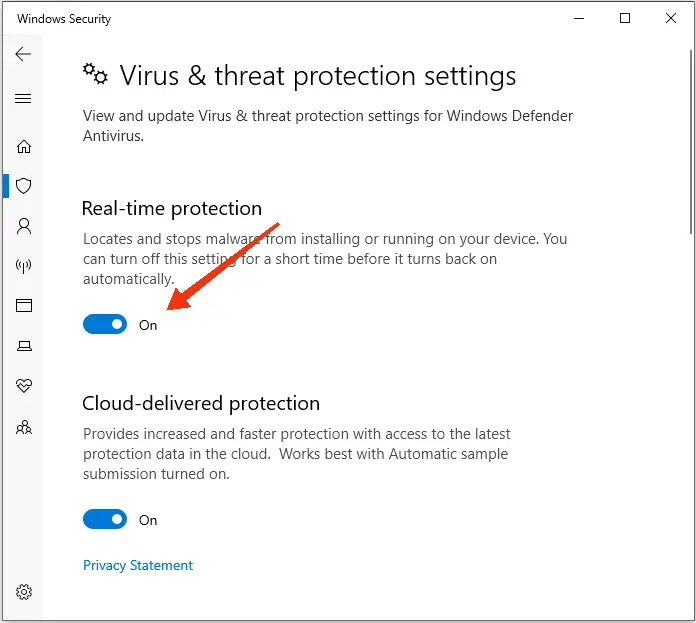
Real-time protection
- Restart your computer to apply the changes.
Note: Despite disabling real-time protection, the scheduled scans will continue as usual.
So, these are the top nine solutions to fix the nonpaged error message on Windows 10/11.
Conclusions
Though the nonpaged issue is not harmful to your computer if you act swiftly to sort it out, it can cause serious damage if it is running on a full scale. This includes the abrupt functioning of your computer.
Hence, work around the above fixes if you encounter the issue for the first time to stop its recurrence.