If you do not want to interrupt any process running in your Windows 10 or want to see the time and other notifications on the lock screen, then you need to change lock screen timeout Windows 10. For a mysterious reason, there is no visible option to control the Windows 10 lock screen timeout settings. By default, the lock screen timeout Windows 10 in one minute. However, you can modify the Registry to enable a new option in the power settings to change the time to anything you want. Here you can find two different methods how you can change lock screen timeout Windows 10.
Method 1- Change lock screen timeout Windows 10 by Editing the Windows Registry Manually
First, you need to access your Registry to add the timeout setting to your Windows 10 PC power options. You can do this by editing the Registry manually, or by downloading a one-click script that will do all the job for you. After adding this setting to your Registry, you’ll be able to adjust the timeout using the Power Options applet in the Control Panel.
Step 1: To start, press “Win + R,” type regedit and press the Enter button to open the Windows Registry`
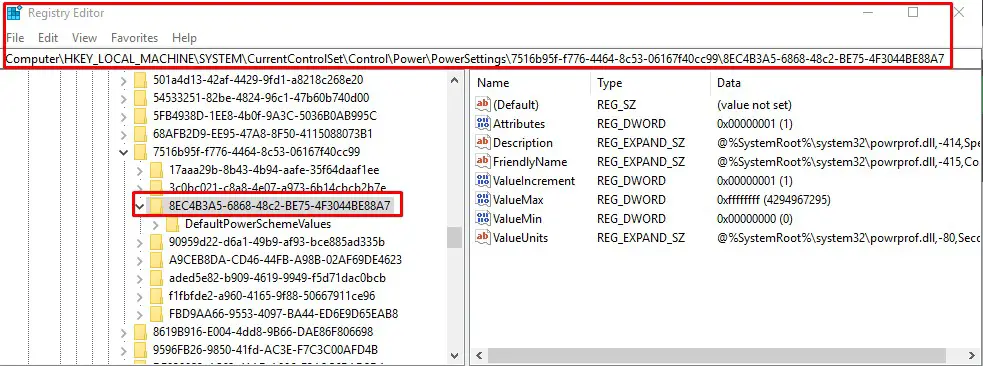
Step 2: Once the Windows Registry has been opened, navigate to the following location:
HKEY_LOCAL_MACHINE\SYSTEM\CurrentControlSet\Control\Power\PowerSettings\7516b95f-f776-4464-8c53-06167f40cc99\8EC4B3A5-6868-48c2-BE75-4F3044BE88A7
Step 3: In the right-hand pane, double left-click the Attributes value to open the properties windows. Change the value in the “Value data” box from 1 to 2, then click OK.
Step 4: Now, close the registry editor and restart your system to make the changes take effect. You can also sign out and sign in if you don’t want to completely restart your system. If you ever want to remove this setting from Power Options, simply go back and change the Attributes from 2 back to 1.
Step 5: Now that you have the timeout setting enabled through the Registry, it’s time to go into Power Options in the Control Panel to change lock screen timeout Windows 10.
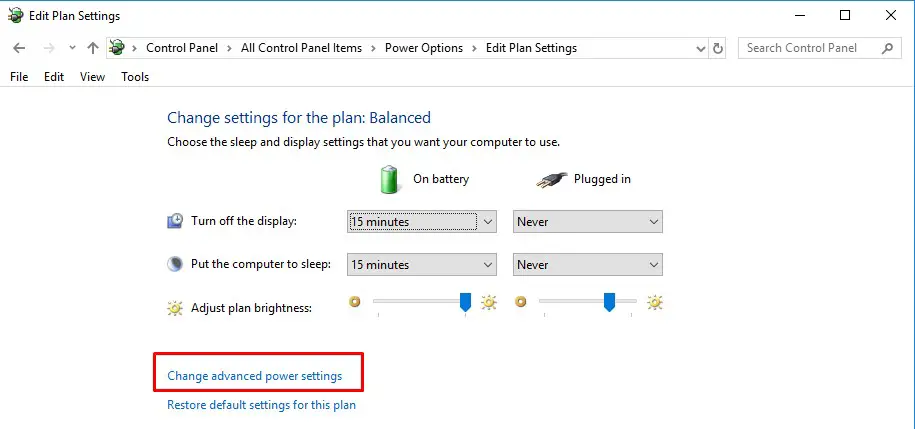
Step 6: Now, click on the “Change Plan Settings” link next to your power plan.
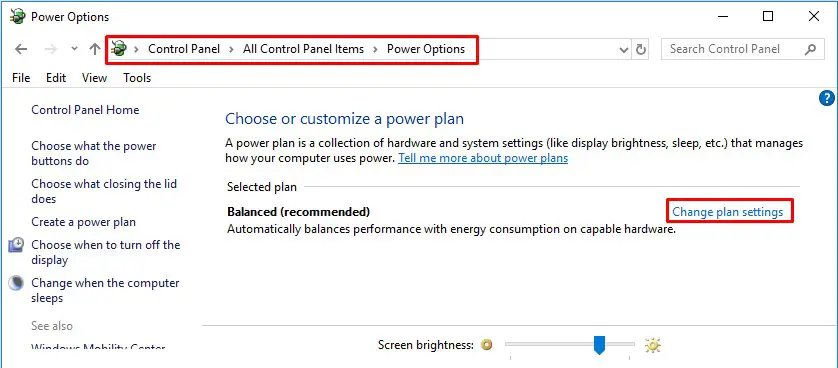
Change Plan Settings Windows 10 Lock Screen
Step 7: Click the Change advanced power settings link.
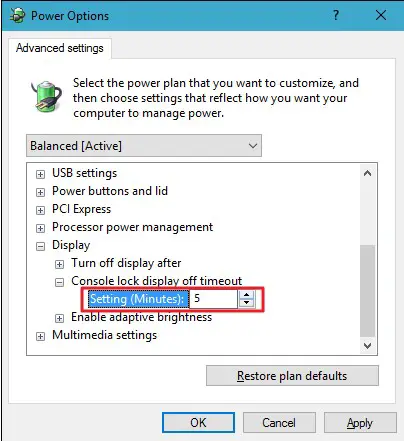
Step 8: In the Power Options dialog, expand the “Display” item and you’ll see the new setting you added listed as “Console lock display off timeout.” Expand that and you can then set the timeout for however many minutes you want.
From this point forward, your lock screen will timeout according to the time you’ve set and not by the one minute default.
Method 2- Change lock screen timeout Windows 10 by Editing the Windows Registry Automatically
If you don’t feel like diving into the Registry yourself, you can use the script below. The “Add Lock Screen Timeout Setting to Power Options” hack creates the changes the Attributes value from 1 to 2. The “Remove Lock Screen Timeout Setting from Power Options (Default)” hack changes the Attributes value from 2 back to 1, restoring its default setting.
Open an empty notepad and copy paste the script below. Save the notepad as Change lock screen timeout Windows 10.reg
[HKEY_LOCAL_MACHINE\SYSTEM\CurrentControlSet\Control\Power\PowerSettings\7516b95f-f776-4464-8c53-06167f40cc99\8EC4B3A5-6868-48c2-BE75-4F3044BE88A7]
“Attributes”=dword:00000002
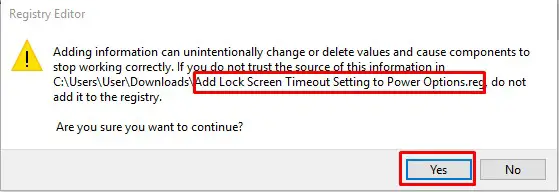
Double-click the one you want to use and click through the prompts. When you’ve applied the hack you want, the changes will take place immediately.
If you ever want to remove this setting from Power Options, simply open an empty notepad and copy paste the script below. Save the notepad as Remove change lock screen timeout Windows 10.reg
[HKEY_LOCAL_MACHINE\SYSTEM\CurrentControlSet\Control\Power\PowerSettings\7516b95f-f776-4464-8c53-06167f40cc99\8EC4B3A5-6868-48c2-BE75-4F3044BE88A7]
“Attributes”=dword:00000001
Double-click the one you want to use and click through the prompts. When you’ve applied the hack you want, the changes will take place immediately

