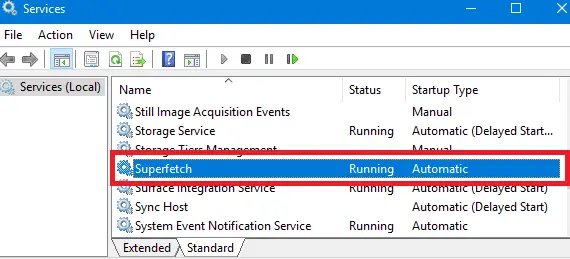
As a Windows user, you might have noticed that when you launch a program for the first time, it takes a longer time. The next time you’re opening the program, however, it will open faster and that’s because Windows stores some information on RAM that makes the program load faster. All this is because of an inbuilt feature called SuperFetch, in older versions of Windows, it’s called Prefetcher. Superfetch will keep track of the applications you’re using the most and then save this information to RAM so that the program loads faster. In this article, we will explain all the methods to disable Superfetch including also the cmd commands.
Superfetch is a very useful feature in Windows but it comes with its downsides and among the downsides is that it can cause your PC to perform slowly by causing Disk and CPU usage 100%. This is due to the fact that it saves program data to RAM to help the program access the info fast than fetching the info from hard disk. This is definitely among the reasons why most people want to disable Superfetch. We’ll walk you through all the possible methods you can disable Superfetch on your Windows PC.
So to keep it straight for you, Superfetch is a service on Windows that speed up launching programs and application by pre-loading the data needed by the app fast, it caches data to RAM for the programs you’re using the most.

Disable Superfetch On Windows
How to Disable Superfetch On Windows
Disabling Superfectch – Is It Safe?
There is no risk involved in disabling Windows Superfetch since it’s not a mandatory service or any important windows component that will cause your PC to malfunction. But if your system is running slow and you notice that Superfetch is occupying a lot on CPU or Disk usage thereby causing problems to your PC, you can consider disabling it.
Method 1: How to Disable Superfetch using Windows services
- Open ‘Run’ by pressing Windows + R keys.
- In the dialog box, you should type MSC and hit enter or press OK.
- A window will open where you can see the list of services running on your PC, locate “Superfetch” from the list, if you can’t locate it, you can search “superfetch” from the search field so that it can show up quick.
- Right-click on “Superfetch” and from the context menu, you should click “Stop”.
- It will take a while to stop the program and you can see the status in the progress bar.
- Once it’s finished, you then right-click on “Superfetch” again and click on ‘Properties’ from the context menu.
- In the “Startup type” menu, you should click on “disabled”.
- Click “Apply” and then “Ok” to apply the changes.
- You have to disabled superfetch and the next time you want to enable it, you should follow the steps above if you want to enable it through Windows services.
Method 2: How To Disable Using Registry
- Open Run as you did in the previous method by pressing Windows + R keys.
- Type Regedit in the dialog box and hit enter or click OK.
- You’ll be prompted to allow the registry editor to make changes on your PC, accept by clicking yes.
- The registry editor will now open and you need to locate HKEY_LOCAL_MACHINE and click on the arrow that’s next to it. It’s located on the left pane menu, this will expand a list of contents.
- Then you navigate to this path: SYSTEM > CurrentControlSet > Control > Session Manager > MemoryManagement > PrefetchParameters.
- You should now double click “EnablePrefetcher” which is by the right, the DWORD value box will open.
- In the field value, you should type 0.
- Entering the 0 value will now disable Superfetch and then next time you want to enable it, you should change the value to 3.
- That’s it, you now click OK, and then exit the registry editor from the file menu, you’ll see the option “Exit”.

Disable Superfetch Using Registry
Method 3: Disable Windows Superfetch Using Command Prompt (CMD)
- Open the command prompt, you can locate the command prompt by searching “CMD” or “Command Prompt” on Windows search, right-click, and select “Run as Administrator” from the context menu.
- You then run the following command when CMD opens:
sc stop "SysMain" & sc config "SysMain" start=disabled
- Hit enter to run the command, when done, it means Superfetch has been disabled.
- If you want to enable the Superfetch using the command prompt, you should now run the command:
sc config "SysMain" start=auto & sc start "SysMain"
- Once finished, you now close the command prompt window and you’re done.

Disable Using Command Prompt (CMD)
Method 4: How to Disable Windows Superfetch With PowerShell
- Open Powershell as the administrator, you can search for “Powershell” on Windows search, right-click and select “Run as Administrator”.
- When PowerShell opens, you should type this command:
Stop-Service -Force -Name “SysMain”; Set-Service -Name “SysMain” -StartupType Disabled
- Press enter to run the command and close the Windows when done.
- If you also want to enable using the PowerShell, you run this command and hit enter as well:
Set-Service -Name "SysMain" -StartupType Automatic -Status Running
- You now close the PowerShell Window and you have successfully disabled or enable SuperFetch.

How to Disable With PowerShell
These are the best ways you can disable/enable SuperFetch on your Windows machine. Let us know the method that worked for you in the comments. If you have another method that’s not listed in the post please do let us know.

