Windows Defender is designed to protect your PC against threats, but for some reason, sometimes it ends up causing problems to your PC. It can prevent some programs from running or can block some settings on your computer. Whatever your reason is for disabling Windows Defender on Windows 10, you can do that using different methods. In this post, we’ll outline all the methods you can follow to disable Windows Defender on Windows 10. Without any delay let’s outline these methods.
How To Disable Windows Defender On Windows 10
Method 1: Using Windows Security
- Open Windows Security, you can search for it on Windows Search from Start Menu, once you search it will show up and then you click on it.
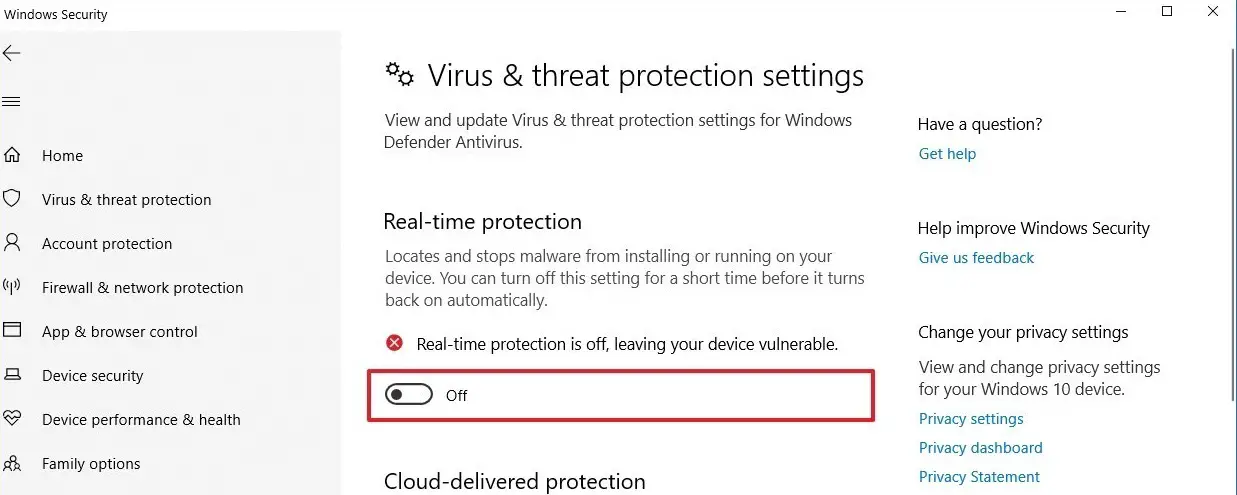
- You’ll see the option “Virus & threat protection”, click on it.
- Then you click on “Manage Settings” under the “Virus and threat protection” settings.
- There would be a “Real-Time Protection” option which can be switched off/on, switch it off if you want to disable Windows defender. If you also want to enable it, you come back and switch ON.

- Under Windows Defender you’ll notice the option “Turn off Windows Defender Antivirus” policy, you should double click on it.
- Check the “Enabled” option, this will disable Windows Defender on your Windows 10 Device.
- Click Next after that, and then “Apply” and “OK” for the changes to take effect, whenever you want to enable it. You can follow the same steps and uncheck the option you just selected.

Method 3: Using Regedit
This involves disabling Windows Defender using the registry editor. You should understand that editing the registry can be risky and hence we suggest registry backup before making any changes to your registry. With that said here is how to disable Windows Defender on Windows 10 using Regedit:
- Go to Windows Search and type “Regedit”, the registry editor will be listed and you need to click to open the registry editor.
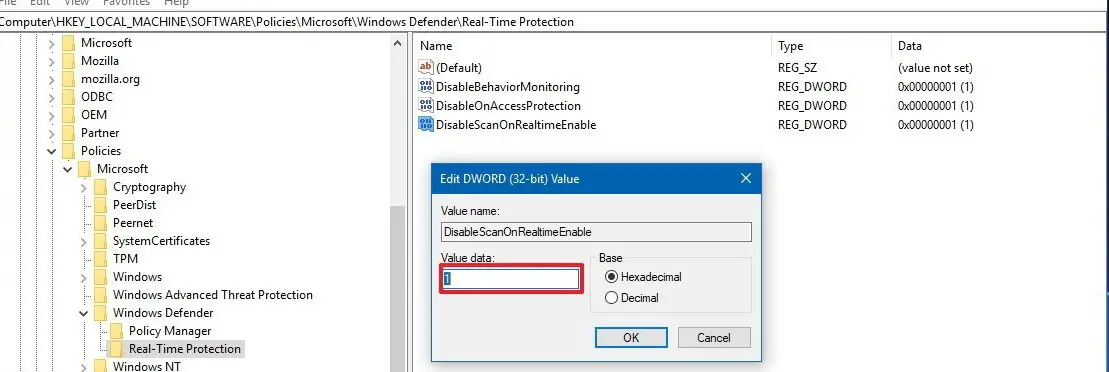
- You now navigate to this path:
HKEY_LOCAL_MACHINE\SOFTWARE\Policies\Microsoft\Windows Defender
- Right-click the Windows Defender folder and select “New”.
- Next, you click on “DWORD (32-bit) Value”.
- Name the key as “DisableAntiSpyware” and hit “Enter”.
- Double click on the new “DWORD” created and change the value to 1.
- Click “Next” and “Ok”.
- Restart your computer for the changes to take effect.
- If you want to enable Windows Defender with this method, you should right-click on the “DisableAntiSpyware” key option above to delete it.

Method 4: Using Windows Services
- Open the Run dialog by pressing Windows + R keys.
- Type “services.msc” in the box and press Enter or click OK.
- Locate Windows defender from the list of services and right-click on it.
- Select properties from the context menu.
- When the Windows Defender Service Properties window open, head over to “General Settings”
- Select the startup type for Windows Defender as “Disabled” and also uncheck the box.
- Click “OK” to exit and also restart your computer.
Method 5: From The App Settings
- Launch Windows Defender on your computer.
- Go to ‘Settings’ and select “Administrator”.
- You’ll see the option “Turn on Windows Defender” with the box checked, you need to uncheck the box to disable Windows Defender.
- Click save changes and you have disabled it using the app.
These are so far the effective methods you can follow in order to switch off Windows Defender on Windows 10. We hope you’re able to disable Windows Defender on your PC. Let us know if you know other methods that have not been listed here.

