Whether it’s to keep things organized or personal preference, you can rename hard drive and change hard drive letters. Here in this post, we will show you how to do it in Windows 10.
Introduction
In Windows 10, every drive uses a familiar name that helps you identify it. For instance, the drive that holds the operating system is called Local Disk. At the same time, a USB memory stick is named USB Drive. Also, network drives and mapped drives use the locations they point to as their names. Although Windows 10 sets default names for every drive, you might want to customize the drives from your computer to recognize them more easily.
Anytime you connect an external hard drive to a PC, the computer assigns it a drive letter that enables computer programs. By default, the hard disk drives on your computer use the same name ‘Local Disk’. You use drive letters such as C, D, E, F, etc. to distinguish different hard disk drives.
IMPORTANT:
- You must be logged on to your computer as the administrator in order to rename hard drive and change hard drive letters.
- This guide works on the renaming of mapped drives, network drives, flash drives, and disk partitions in your Windows 10 PC.
- None of the methods shared in this guide work for optical drives like Blu-ray drives or CD/DVD drives.
- You cannot use spaces between words when you rename your hard drive.
Way 1: How to rename hard drive from File Explorer
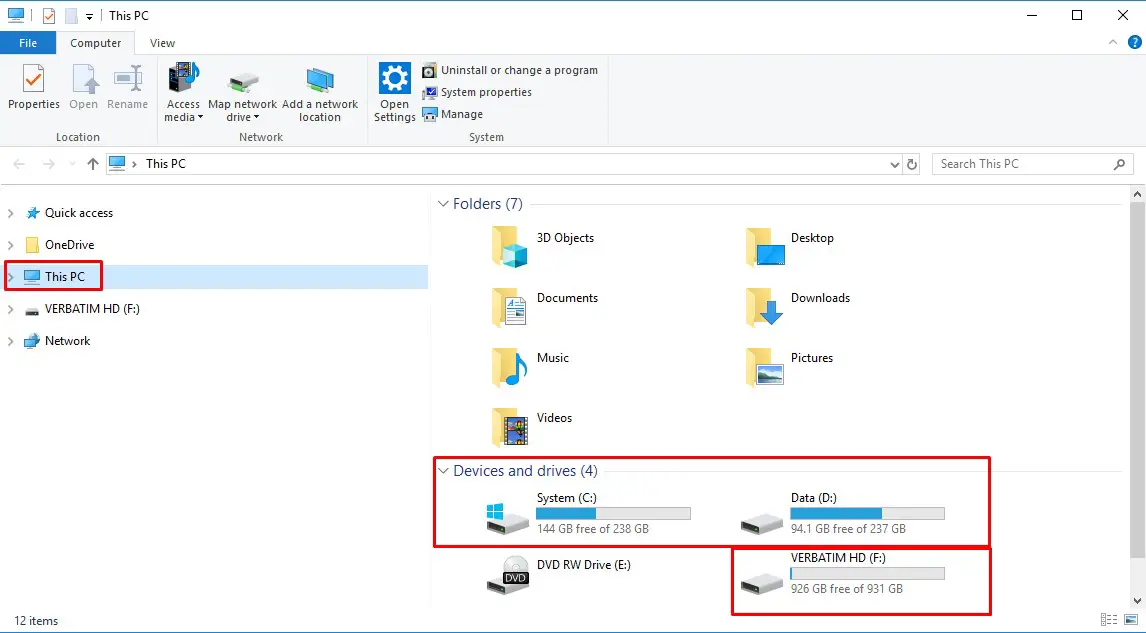
Step 1: Launch File Explorer in Windows 10, and then select This PC. There you see all the drives and network locations that exist in Windows 10.
Step 2: Under the “Devices and drives” section, right-click on the drive you want to rename, and select Rename from the context menu.
Step 3: Then the name of the disk is changed to an editable field. Type your desired name in the field and hit Enter to apply the name.
You can also click or tap on the drive that you want to rename, and then press the F2 key on your keyboard. No matter which method you chose to get here, type the new name that you want for the selected drive. Press Enter on your keyboard or click or tap somewhere in the empty space from the File Explorer window to apply it.
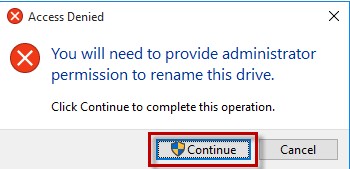
Note that if you rename the drive where the operating system is installed, you will need to provide administrator permission.
Way 2: How to rename hard drive from Disk Management
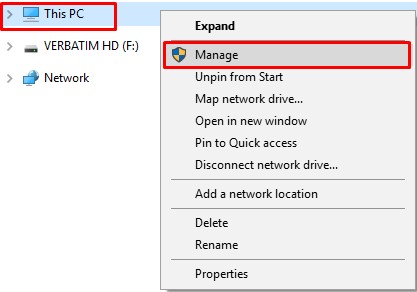
Step 1: Open the Disk Management in Windows 10 by right-clicking on This PC icon and then Manage
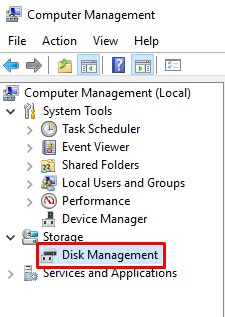
Step 2: Select Disk Management from the menu.
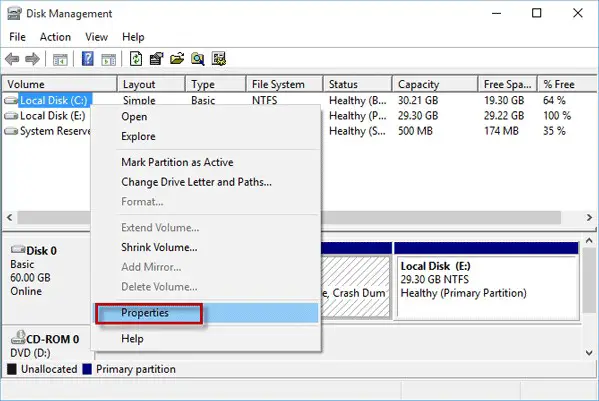
Step 3: Right-click on the disk drive you want to rename under the Volume list, and then select Properties from the context menu
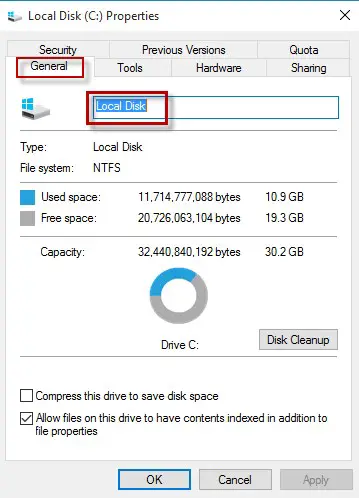
Step 4: After the Properties dialog opens, select the General tab, type your desired name in the field following the disk icon, and click OK to apply the name.
Way 3: How to rename hard drive with Command Prompt
Step 1: Press Win + X, and then select Command Prompt (Admin) from the menu to open Command Prompt as an administrator in Windows 10.
Step 2: Type the command:
label <drive letter>: <drive name>
Press the Enter key. For example, type label F: External and press Enter to rename external hard drive F from “Verbatim HD” to ”External”.
Change hard drive letter in Windows 10
While they might seem set in stone, the letters assigned to your hard drives, optical drives, and USB based drives in Windows are very much not a fixed thing. Maybe you’re using a new external hard drive and now you want to change the drive letter to G from the F it was assigned, or maybe you just like to keep your flash drives organized at the end of the alphabet.
Whatever the reason, the Disk Management tool in Windows makes changing drive letters surprisingly easy, even if you’ve never worked with your drives in any way before.
Changing drive letters in Windows usually takes less than a few minutes, at most.
How to change hard drive letter with Command Prompt
Step 1: Open the Disk Management in Windows 10 by right-clicking on This PC icon and then Manage
Step 2: Select Disk Management from the menu.
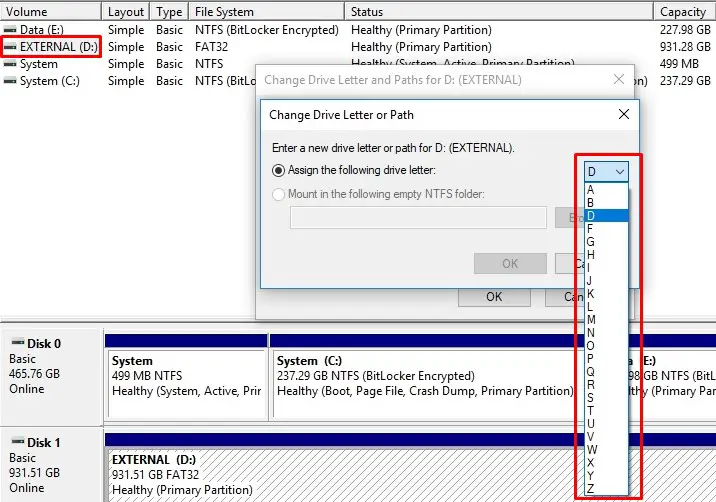
Step 3: Right-click or tap-and-hold the drive and choose Change Drive Letter and Paths
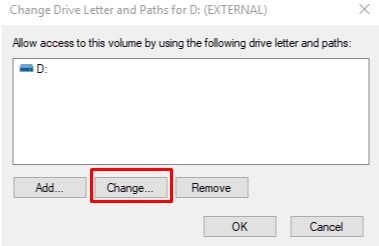
Step 4: Select Change.
Note: If you’ve selected the primary drive by accident, some versions of Windows will display a message that reads Windows cannot modify the drive letter of your system volume or boot volume.
Step 5: Choose the drive letter you want Windows to assign to this storage device by selecting it from the Assign the following drive letter drop-down box. You don’t need to worry if the drive letter is already being used by another drive because Windows hides any letters you can’t use.
Step 6: Select OK.
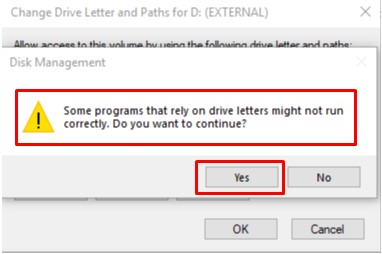
Step 7: Choose Yes to the Some programs that rely on drive letters might not run correctly. Do you want to continue?
Once the drive letter change is complete, which usually only takes a second or two, you’re welcome to close any open Disk Management or other windows.
Conclusions
As you have seen in this guide, there are many ways to rename a drive and change hard drive letters in Windows 10. Unfortunately, not all of them work for all types of drives. Some methods can be used to rename network drives as well as storage drives, while others work only for storage drives. Hopefully, our guide has managed to help you find the solution you need for the type of drive that you want to rename. If you have any problems or errors, do not hesitate to share them in the comments below.
