This tutorial will explain how to silent install Java MSI/EXE version and disable auto-update. The command line will also uninstall the older version of Java and install a new version.
Also silent install guides for other application here: Complete List
Java Silent Install
How to Silent Install Java (32-bit) (EXE)
- Download the EXE 32-bit file from:
https://www.java.com/en/download/manual.jsp - Download the file to a folder like (C:\Install_Test)
- Open a CMD by Right-Clicking on CMD and select Run as Administrator
- Navigate to the C:\Install_Test folder
- Enter the following command:
MsiExec.exe /i jre-8u261-windows-i586.exe /s REBOOT=Suppress
- Change the “jre-8u261-windows-i586.exe” with your downloaded version.
- Press Enter
Java should be installed and find entries in the Programs and Features in the Control Panel.
How to Silent Install Java (64-bit) (EXE)
- Download the EXE 64-bit file from:
https://www.java.com/en/download/manual.jsp - Download the file to a folder like (C:\Install_Test)
- Open a CMD by Right-Clicking on CMD and select Run as Administrator
- Navigate to the C:\Install_Test folder
- Enter the following command:
start /wait jre-8u261-windows-x64.exe /s REBOOT=Suppress
- Change the “jre-8u261-windows-x64.exe” with your downloaded version.
- Press Enter
How to Silent Install Java MSI Version
- Download MSI Version of Java explained below
- Save the file to a folder like (C:\InstallJava_Test)
- Open a CMD by Right-Clicking on CMD and select Run as Administrator
- Navigate to the C:\InstallJava_Test folder
- Enter the following command:
start /wait msiexec /i "%~dp0jre1.8.0_261.msi" RebootYesNo=No /q
- Press Enter
Silent Install with an additional configuration file
If you want to use more advanced changes, you will need to create a configuration file to use it with the offline EXE installer.
Step 1 – Create a text file, save it as a .cfg extension
Step 2 – Use the options below to carry out what you want to do with your installer:
INSTALL_SILENT=Enable, Disable
INSTALLDIR=PATH
AUTO_UPDATE=Enable, Disable
WEB_JAVA=Enable, Disable
WEB_JAVA_SECURITY_LEVEL=H (high), VH (very high)
EULA=Enable, Disable
REBOOT=Enable, Disable
NOSTARTMENU=Enable, Disable
SPONSORS=Enable, Disable
Note! Change the parameters as you need. For example “INSTALL_SILENT=Enable”
Step 3 – Save the config is in the same directory as the installer exe, the option INSTALLCFG="%cd%\jre-install-options.cfg" can be used.
Step 4 – The command line you would then use to run the offline installer and configuration file would be:
jre1.8.0_91.exe INSTALLCFG=”%cd%\jre-install-options.cfg”
How to Disable JAVA Auto-Update on installation
To disable Java Auto Updates You need to use the following command:
For EXE version:
start /wait jre-8u261-windows-i586.exe /s AUTO_UPDATE=0

start /wait jre-8u261-windows-x64.exe /s AUTO_UPDATE=0
For MSI version:
start /wait msiexec /i "%~dp0jre1.8.0_261.msi" /q JU=0 JAVAUPDATE=0 AUTOUPDATECHECK=0
How to Disable JAVA Auto-Update on Regedit
To disable Java Auto Updates on regedit for 32 an 64-bit version you need to use the following command:
Disable java updates 32-bit:
reg add "HKLM\SOFTWARE\Wow6432Node\JavaSoft\Java Update\Policy" /v EnableJavaUpdate /t REG_DWORD /d 00000000 /f
Rem Disable Java Update 64-bit:
reg add "HKCU\SOFTWARE\JavaSoft\Java Update\Policy" /v EnableJavaUpdate /t REG_DWORD /d 00000000 /f
REM Disable Auto Update Check:
reg add "HKLM\SOFTWARE\Wow6432Node\JavaSoft\Java Update\Policy" /v EnableAutoUpdateCheck /t REG_DWORD /d 00000000 /f
How to Create an Installation Log File
You can generate logs during installation when you use the MSI or EXE installer. So in this case you can troubleshoot if anything goes wrong.
For Exe Version
start /wait jre-8u261-windows-i586.exe /s REBOOT=Suppress /L "C:\Install_Test"

start /wait jre-8u261-windows-x64.exe /s REBOOT=Suppress /L "C:\Install_Test"
For MSI Version
start /wait msiexec /i "%~dp0jre1.8.0_261.msi" RebootYesNo=No /q /L*V "C:\Install_Test"
How to remove the Older version during installation:
To remove the oldest version during the installation of the new one you can use “REMOVEOUTOFDATEJRES=1”. This parameter working only with the MSI version:
start /wait msiexec /i "%~dp0jre1.8.0_261.msi" RebootYesNo=No /q REMOVEOUTOFDATEJRES=1
How to Uninstall Java Silently:
- Open a CMD window as Administrator
- Enter one of the following commands:
Java 8 update 91 (32-bit)
MsiExec.exe /X{26A24AE4-039D-4CA4-87B4-2F83218091F0} /qn
Java 8 update 91 (64-bit) (64-bit)
MsiExec.exe /X{26A24AE4-039D-4CA4-87B4-2F86418091F0} /qnPress Enter
Note! please keep in mind that every java version has a different product key. See below the method to find the product key
How to find the Product key of java
To find the product key of the applications you will need to navigate to the following path and search for the JAva entry. UninstallString is the key that contains the product key.
(64-bit)
Computer\HKEY_LOCAL_MACHINE\SOFTWARE\Microsoft\Windows\CurrentVersion\Uninstall\
(32-bit)
Computer\HKEY_LOCAL_MACHINE\SOFTWARE\WOW6432Node\Microsoft\Windows\CurrentVersion\Uninstall\
How to extract MSI for Java
You can use the .EXE to extract the .MSI. Go to the Java Update website >>http://www.java.com/en/download/manual.jsp to download the latest Java Update.
Step 1 – First select windows offline to download the .exe on PC. After downloaded, execute the .exe file
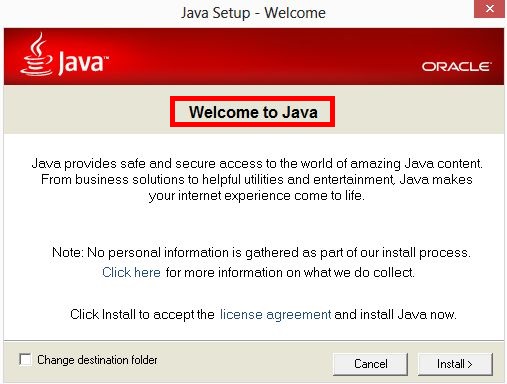
Step 2 – Once you see the “Welcome to Java” go to :
C:\Users\UserName\AppData\LocalLow\Sun\Java
For news version of java:
C:\Users\Administrator\AppData\LocalLow\Oracle\Java
Step 3 – You will see a directory of past Java Updates plus the new installation directory denoted by the Java version number.
Get the MSI file and save it to a folder in your computer.
Step 4 – Repeat this for the 64-bit version and save MSI to the same folder.
How to create a package to deploy Java over the network
MSI version
Step 1 – Download the EXE 64-bit file from:
https://www.java.com/en/download/manual.jsp
Step 2 – Extract the MSI file explained above. Repeat for both 32 and 64-bit versions and save them to a new folder “C:\Install_Test” with a different name.
Step 3 – Create the batch file
Open notepad and write the following command line:
@echo off
REM Uninstall Java X 32bit (replace Product code with your java version)
Start /wait msiexec.exe /x {Product code of your older java 32 bit} /qn /norestart
REM Uninstall Java X 64bit (replace Product code with your java version)
Start /wait msiexec.exe /x {Product code of your older java 64bit} /qn /norestart
REM Java MSI Silent Install version X 32Bit (replace with your java version downloaded)
start /wait msiexec /i "%~dp0java8.261x32.msi " JU=0 JAVAUPDATE=0 AUTOUPDATECHECK=0 RebootYesNo=No WEB_JAVA=1 /q
REM Silent install Java MSI version X 64Bit (replace with your java version downloaded)
start /wait msiexec /i "%~dp0java8.261x64.msi " JU=0 JAVAUPDATE=0 AUTOUPDATECHECK=0 RebootYesNo=No WEB_JAVA=1 /q
del /S /F /Q "C:\Program Files (x86)\Common Files\Java"
@End
Step 4 – Save the notepad file as install.cmd inside the folder where we copied the Java MSI files “C:\Install_Test”.
Step 5 – Just right-click on install.cmd and run as administrator. As a result, the install will be finished after a few seconds.
Note! Change on the script the name of the MSI files as per yours!
Exe Version
Step 1 – Download the EXE 32-bit and 64-bit file from:
https://www.java.com/en/download/manual.jsp
Step 2 – Save them to a new folder “C:\Install_Test”.
Step 3 – Create a new text file named install.cmd in the same folder “C:\Install_Test” and copy/save below the command line:
REM Uninstall Java 8 Update 50
start /wait msiexec.exe /x {26A24AE4-039D-4CA4-87B4-2F83218051F0} /qn /norestart
REM Uninstall Java 8 Update 50 64 bit
start /wait msiexec.exe /x {26A24AE4-039D-4CA4-87B4-2F86418051F0} /qn /norestart
REM Silent Install Java exe version
@ECHO OFF

start /wait jre-8u261-windows-i586.exe /s REBOOT=Suppress /L "C:\Install_Test"
start /wait jre-8u261-windows-x64.exe /s REBOOT=Suppress /L "C:\Install_Test"

@echo Disable Auto Updates
reg delete "HKLM\SOFTWARE\Wow6432Node\JavaSoft\Java Update\Policy\jucheck" /v "UpdateSchedule" /f
reg delete "HKLM\SOFTWARE\Wow6432Node\JavaSoft\Java Update\Policy\jucheck" /v "UpdateMin" /f
REM Disable java updates
Rem Disable java updates 32-bit:
reg add "HKLM\SOFTWARE\Wow6432Node\JavaSoft\Java Update\Policy" /v EnableJavaUpdate /t REG_DWORD /d 00000000 /f
Rem Disable Java Update 64-bit:
reg add "HKCU\SOFTWARE\JavaSoft\Java Update\Policy" /v EnableJavaUpdate /t REG_DWORD /d 00000000 /f
REM Disable Auto Update Check:
reg add "HKLM\SOFTWARE\Wow6432Node\JavaSoft\Java Update\Policy" /v EnableAutoUpdateCheck /t REG_DWORD /d 00000000 /f
Step 4 – Change the product code to install your current version.
Step 5 – Just run As Administrator and will perform a silent installation of java.
The script will uninstall the older version of java, install a new version, and also disable auto-updates.

Java Offline EXE Silent Installation
Deploy Java.
Finally, you can deploy java with sccm 2012. Moreover follow the link for more information: Deploy Java
If you have any questions about the silent install of java feel free to ask in the comment section.


