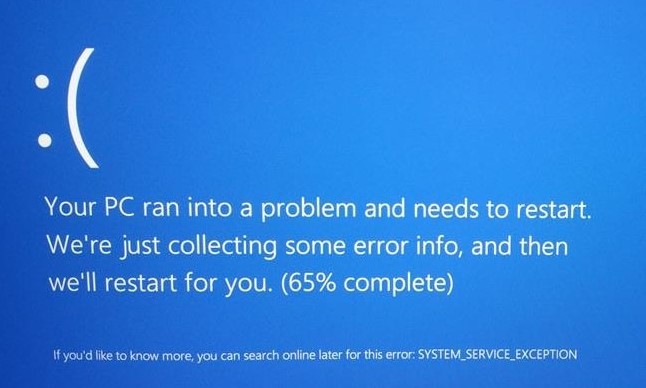
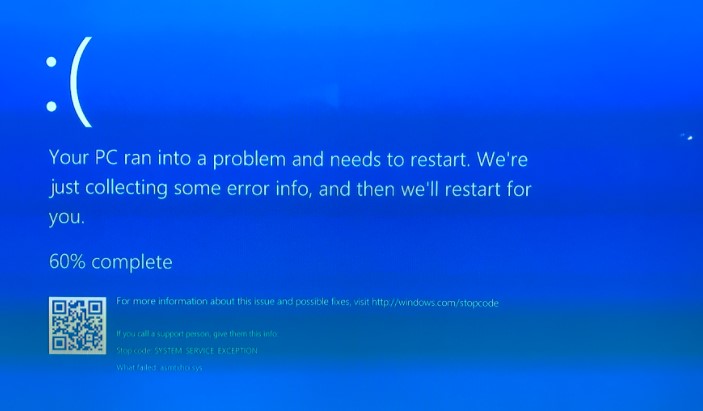
This article discusses “SYSTEM_SERVICE_EXCEPTION” Blue Screen Errors. This error indicates that an exception occurred when executing a routine that changes from non-preferred to preferred code. This error has been associated with excessive use of the paged pool and can occur because the graphics drivers cross the kernel code in user mode and transmit faulty data to the kernel.
What does SYSTEM_SERVICE_EXCEPTION mean?
SYSTEM_SERVICE_EXCEPTION” Blue Screen Error 0x0000003b is a blue screen of death errors which are also known for its bug check error code of “0x0000003b”. Having this problem on your computer fully indicates that your windows operating system having some trouble to proceed one or more of your system’s processes.
Why does the “SYSTEM_SERVICE_EXCEPTION” error occur?
SYSTEM_SERVICE_EXCEPTION” Blue Screen Error 0x0000003b will come out of nowhere and will cause your computer to crash, after which you will get a BSOD and you have to restart your computer. Numerous users have reported that this error is a common one for Windows 7, 8.1, and 10 users. It could be a one-off error caused by a bug in Windows itself, or it could be caused by outdated drivers, corrupted system files, or a rogue app that tries to access and run protected Windows code.
If you have one of the following exact error messages, then follow each fix below in order to view the methods for these specific error messages. Check The Table of Content for better navigation.
How to fix ” SYSTEM_SERVICE_EXCEPTION (3b)” error?
“SYSTEM_SERVICE_EXCEPTION” Blue Screen Error 0x0000003b is a system error caused by corrupt or incorrectly configured Microsoft IEEE 1394 device drivers and system files. Wrongly configured system files on the computer results in the blue screen stop 0x0000003b. This BSOD error can be caused by a number of things, but the most commonly found ones are bad RAM, incorrectly setup RAM, a bad GPU, issues with the antivirus, or certain combinations of RAM and CPUs or even when you install new hardware or software that may interfere with other system processes.
Fix 1: Install Hotfix
Microsoft released a hotfix that can be downloaded from here: https://support.microsoft.com/en-us/kb/980932
- Go to the Microsoft Support link
- Click Hotfix Download Available
- Install the Hotfix
- Restart your computer
Fix 2: Check for Faulty Hardware ( RAM or Video Card)
The BSOD errors often caused by faulty hardware (such as RAM, Video Card, and motherboard), therefore, it is highly recommended to check if your hardware works normally. If your hardware doesn’t work well, then you can try to replace it to get rid of the error. What you should do is boot the system with every RAM stick, one by one. If one of them is bad, you will notice it immediately as the system won’t boot, and you will know that you have to change that stick.
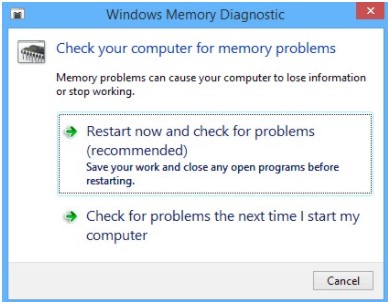
Fix 3: Run the built-in Windows Memory Diagnostic tool
This will test your RAM to see if there is anything wrong with it. To do this, do the following:
- Type “memory diagnostic” into your computer’s search box and click on the application that pops up with the name, Windows Memory Diagnostic
- You will be provided with two options. Use the first option to have the application restart your computer and run a scan on the RAM.
- If it comes back with an error, check to make sure that your RAM is installed properly. If it is, consider replacing it.
- In case you get no errors, the problem is being caused by something else.
Optional: If your motherboard’s BIOS has the Memory Caching feature, then you should disable this feature. Keep in mind that operating in the BIOS environment can be dangerous, so do not attempt to modify other settings if you don’t know what they do.
Fix 4: Timings or frequency are incorrect
This will require you to enter the BIOS of your system, which can be accessed when you turn your computer on, right before Windows boots. Look near the bottom when turning on your computer to see which buttons you need to access the BIOS – they’re usually ESC, F2, F12, or Backspace. Once inside, you should find your RAM’s settings. Each BIOS is different, so you should follow the buttons within the instructions – they will usually tell you to use the function and arrow keys on your keyboard to navigate around. Changing your frequency to 800MHz or 1600MHz, depending on your system, may help solve this issue. It will also take care of the timings of the RAM.
Fix 5: Uninstall your antivirus
From the Start menu, type Change or Remove Programs and open the result. You will be met with a list of software currently installed on your system. Find your antivirus, select it, and choose Uninstall. Follow the wizard to uninstall it, and reboot your system to completely remove all remaining files. After this, your device should be working without any issues or BSODs. Use Revo Uninstaller Pro to uninstall better applications.
Fix 6: Update your drivers
- Go to “Search”, type device manager, and choose “Device Manager” from the result. Then it opens with your computer name at the top and a list of devices that are installed on your computer beneath your computer name.
- Find and right-click the problematic device and choose “Properties”.
- Click “Driver” and then choose “Update Driver”.
- Click “Search automatically for updated driver software”.
- After the update, restart your computer
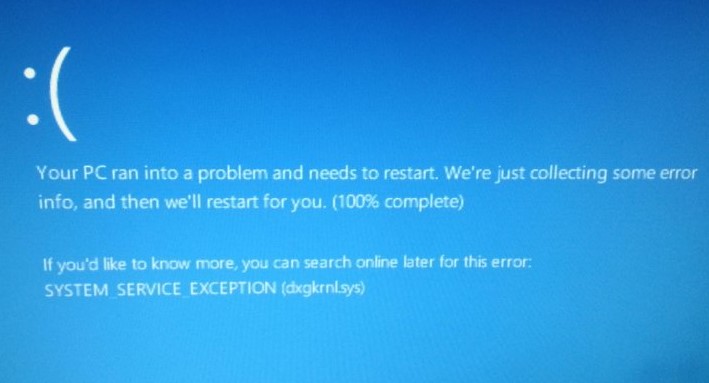
How to fix ” SYSTEM_SERVICE_EXCEPTION (dxgkrnl. sys)” error?
dxgkrnl.sys is Microsoft’s DirectX graphics kernel file. It works with your graphic card’s drivers, and as such, shouldn’t be modified in any way. Getting a BSOD with this message, SYSTEM_SERVICE_EXCEPTION (dxgkrnl.sys) indicates that the graphic card and its drivers have malfunctioned in some way.
Fix 1: Disable SLI
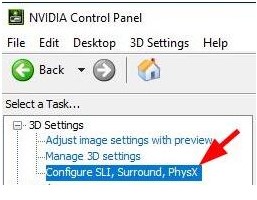
- Go to NVidia Control Panel. You can access it by double-clicking its icon in the bottom right corner.
- Expand the 3D Settings and choose Configure SLI, PhysX, and Surround</strong
- Inside this menu, choose Disable SLI.
- Click Apply to save changes.
Many gamers have two NVidia graphic cards that they use in SLI mode to get better performance. Although this sounds great, it has been reported that SLI can cause problems with dxgkrnl.sys and cause Blue Screen of Death error. After disabling SLI on your computer, the Blue Screen of Death error should be fixed.
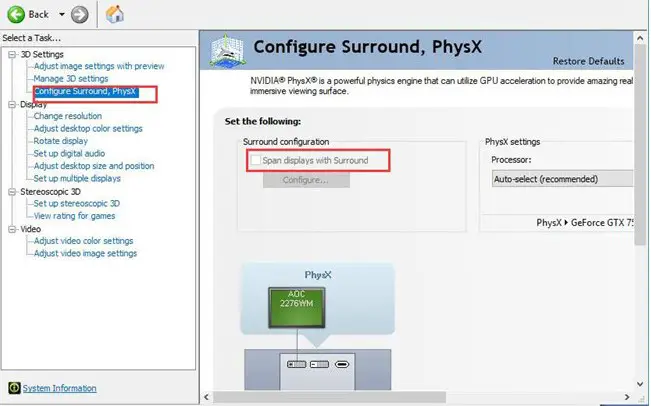
Fix 2: Disable Nvidia Surround
The surround is Nvidia’s technology for people who want to run more than one display at a time, and it offers immersive gaming options that can truly enhance your experience. However, it is known to cause problems with Windows 10, and disabling it can stop those dreaded BSODs from appearing.
- You can use shortcut CTRL+ALT+S or CTRL+ALT+R to turn it off.
- Or you can turn it off on NVIDIA Control Panel too. Go to NVIDIA Control Panel > 3D Settings > Configure SLI, PhysX, Surround > uncheck Span display with Surround.
Fix 3: Uninstall the Nvidia drivers, and let Windows install its own
Since this is after all a driver issue, one more possible solution is to uninstall the drivers you have installed and let Windows install its own. Windows will find compatible drivers which shouldn’t be causing any issues with your computer, and you will be able to use it without worrying afterward. The steps to doing this are fairly easy.
Uninstall the Display Driver:
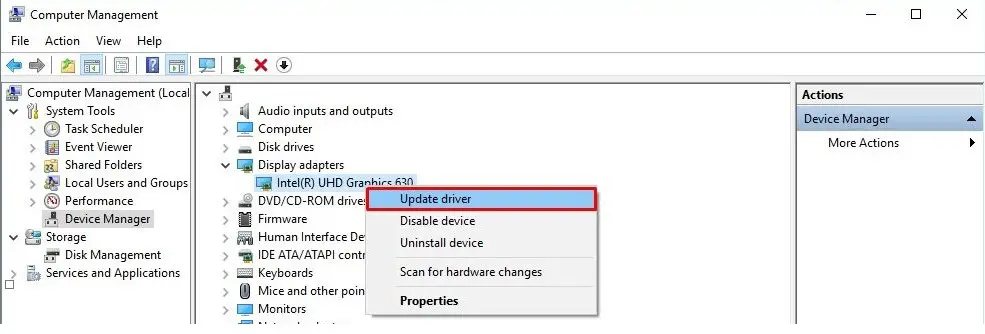
- Right-click Start Menu and choose Device Manager.
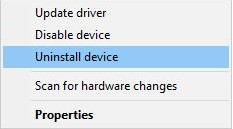
- Expand Display adapters. Right-click your graphics driver and choose Uninstall device.
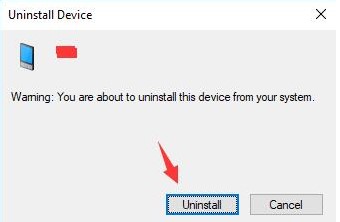
- Confirm to Uninstall the graphics driver on Windows 10.
Immediately Device Manager gets rid of the NVIDIA, AMD, or Intel HD graphics driver for you, get down to reinstalling the up-to-date driver again in hope that the dxgkrnl.sys BSOD won’t appear.
- Let the uninstall wizard do its thing, following the steps, and reboot your system.
- When you reboot, you can use Windows Update to download the latest drivers. Type Windows Update in the Start menu and open the result.
- Click on Check for Updates and Windows should see that no drivers are currently installed for your graphics card, which will make it look for appropriate ones on the Internet.
- Let it download and install them, and reboot your system again.
How to fix ” SYSTEM_SERVICE_EXCEPTION (win32kbase.sys) ” error ?
Win32kbase.sys is one of Windows’ .sys files that are made to interact with drivers and hardware on your system. If removed or otherwise modified, you may get serious errors as it is one of the many essential files for Windows to function normally.
Fix 1: Check for Faulty Hardware ( RAM or Video Card)
The BSOD errors often caused by faulty hardware (such as RAM, Video Card, and motherboard), therefore, it is highly recommended to check if your hardware works normally. If your hardware doesn’t work well, then you can try to replace it to get rid of the error. What you should do is boot the system with every RAM stick, one by one. If one of them is bad, you will notice it immediately as the system won’t boot, and you will know that you have to change that stick.
Fix 2: Check if you have overclocked your hardware
The first logical step is to revert it back to the original state, but if that doesn’t give you enough power, you can try overclocking it again by very small increments, and see if the issue reappears. If overclocking was the problem, by doing it in small increments you can see exactly when you’re going too far and stop. This will prevent issues such as BSOD, and will also extend the lifetime of your hardware.
Fix 3 – Check your Registry for damaged files.
Step 1: Open System File Checker
- Type Command Prompt in the search bar of Windows 10.
- Select the best-matched one and choose Run as administrator.
Step 2: Type the command
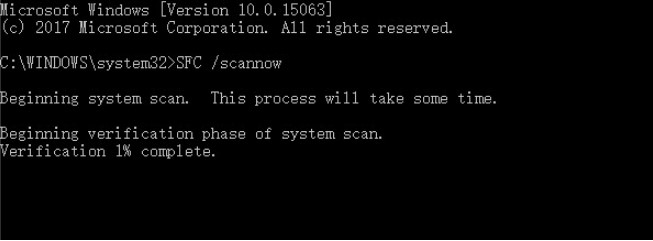
- In the pop-up window, type the command sfc /scannow and hit Enter to continue.
- Please do not close the window until you see the message Verification 100% complete
3.When the process is finished, you can reboot your computer and check whether the error is still present
Fix 4: Run the DISM Tool
In case when the error is still present you can try to run the DISM tool
The DISM tool (Deployment Image Servicing and Management) also perform an in-depth search on your PC, errors that couldn’t be detected by the SFC scan can be detected with DISM.
- Run Command Prompt by following the steps above for the SFC scan.
- You now type this command when Command Prompt open: exe /online /cleanup-image /restorehealth
- Hit enter to run the command, it will now scan for problems on your PC and fix them automatically.
- Restart your pc and after the scan is finished, then check to see if the error is gone.
Fix 5: Update your drivers
- Go to “Search”, type device manager, and choose “Device Manager” from the result. Then it opens with your computer name at the top and a list of devices that are installed on your computer beneath your computer name.
- Find and right-click the problematic device and choose “Properties”.
- Click “Driver” and then choose “Update Driver”.
- Click “Search automatically for updated driver software”.
- After the update, restart your computer
How to fix ” SYSTEM_SERVICE_EXCEPTION (asmtxhci.sys) ” error?
asmtxhci.sys is the driver for the ASMedia USB 3.x XHCI Controller. It manages your system’s USB 3.x ports, as well as all devices connected to them. ASMedia controllers are usually found on ASUS motherboards and laptops, especially on Intel’s chipsets.
If the controller happens to fail, it will happen when you have a USB device connected, and you will get a Blue Screen of Death, saying “SYSTEM_SERVICE_EXCEPTION (asmtxhci.sys)”. This means that you need to reboot your system and there is a problem with the drivers of ASMedia’s controller.
Fix: Update your drivers
- Go to “Search”, type device manager, and choose “Device Manager” from the result. Then it opens with your computer name at the top and a list of devices that are installed on your computer beneath your computer name.
- Find and right-click the problematic device and choose “Properties”.
- When you’re presented with a list of devices connected to your device and their respective drivers, you need to find the ASMedia XHCI controller. Since it’s a USB 3.x controller, you will find it at, or near the bottom of the list, by expanding the Universal Serial Bus controllers menu
- Click “Driver” and then choose “Update Driver”.
- Click “Search automatically for updated driver software”.
- Follow the wizard, which will update the controller for you. Reboot your device when done, and it should be working properly.
How to fix ” SYSTEM_SERVICE_EXCEPTION (KS.SYS) ” error?
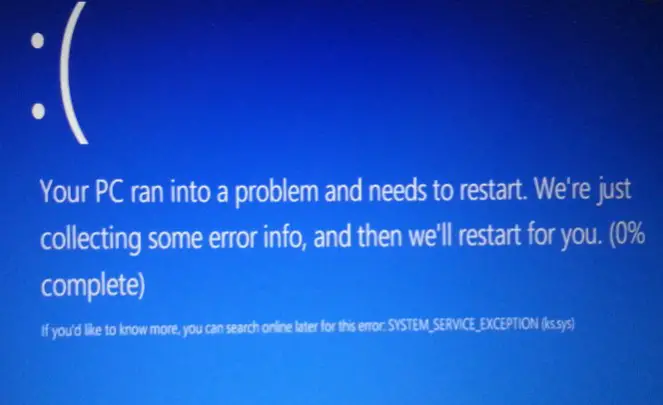
SYSTEM_SERVICE_EXCEPTION (KS.SYS) is one of Windows’ kernel CSA library files. This specific one is connected to the video camera on your computer. It is a process that is an integral part of Windows and a file that shouldn’t be deleted even if it causes errors. The kernel as a whole is considered a vital part of Windows, and you shouldn’t modify it in any way.
SYSTEM_SERVICE_EXCEPTION (KS.SYS) error, followed by a Blue Screen of Death, signals that the system has some sort of miscommunication with the drivers for your video camera. It tends to appear for owners of HP systems with integrated webcams, or owners of an HP webcam. It is usually triggered by an update for Skype, and the most often found one is updating from Skype 6.14.
While this error doesn’t affect a particularly big number of users, there are a couple of methods that you can try to fix it if you’re affected. The first one is to fix your Skype version, and the second one is to fix the video camera drivers.
Fix 1: Revert back to the older version of Skype
- Click the Start button (lower-left corner) – Control Panel – Add/Remove Programs (Windows 7, XP).
- Right-click on Windows icon (lower-left corner) – Control Panel – Uninstall a Program under Programs (Windows 8/10).
- Find the version of Skype that you are currently using, click on it, and select Uninstall.
- Reboot the device.
- We hope that you remember what the previous version of Skype was (probably Skype 6.14). If you do, look for its download on the Internet. Make sure that you download it from a reliable source and check if it’s not bundled with other third-party software.
Fix 2: Uninstall HP’s webcam drivers and let your system install generic ones
If the core of SYSTEM_SERVICE_EXCEPTION (KS.SYS) BSOD is HP’s webcam drives, then we recommend uninstalling the drivers and letting the system run the generic ones automatically.
- Click Start, type Device Manager in the search box, and hit Enter (Windows 7, XP).
- Right-click on the Windows icon (bottom left corner) and select Device Manager (Windows 8/10).
- Find the Imaging device on the list and expand it.
- Here locate HP’s device drivers, right-click on them, and select Uninstall.
- After that, reboot the device.
- Now Windows system will automatically activate the generic drivers
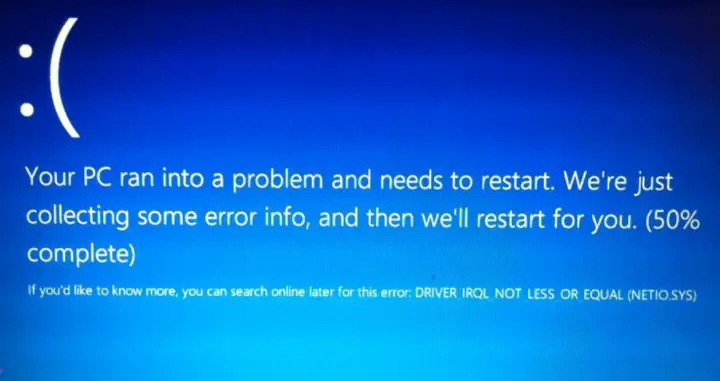
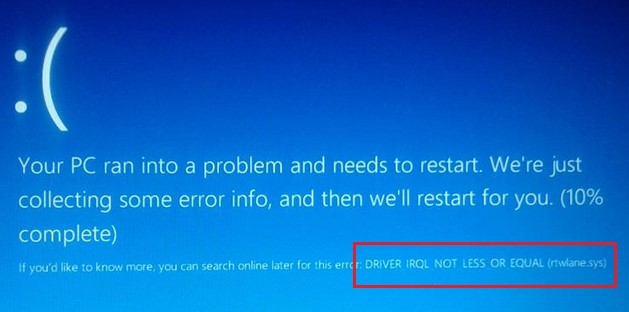
How to fix ” DRIVER_IRQL_NOT_LESS_OR_EQUAL (netio.sys) OR SYSTEM_THREAD_EXCEPTION_NOT_HANDLED (netio.sys) ?
Netio.sys is Windows’ Network I/O subsystem file. It is a part of Windows that should not be deleted or disabled in any way, given that it interfaces with your system’s network card and its drivers, and modifying or removing it may cause the card to stop functioning.
Fix 1: Check your anti-malware software
While netio.sys concerns your system’s network adapter, it has been known to cause conflicts with some fairly popular antivirus programs, most notably McAfee and Zone Alarm. If you’re using any of them, you can try removing them and seeing whether the errors continue.
- Press on Ctrl + Shift + Esc simultaneously to launch Task Manager
- Locate McAfee/Zone Alarm
- Click on the application and select End Task
- Type in Control Panel into Cortana’s search bar and hit Enter
- Go to Programs > Uninstall a program
- Locate McAfee or Zone Alarm and double click it
- Proceed with on-screen instructions
Please remember that leaving your system unprotected can cause it serious harm due to malware infections. You can simply rely on Windows Defender (which is a built-in security software from Microsoft) or find a comprehensive security program online
Fix 2: Check torrent software for cache
Netio.sys error is triggered by the network threshold. To check your Torrent software, you have to:
- Open BitTorent client
- Go to Options and pick Preferences
- Click on Advanced and pick Disk Cache
- Untick Enable caching of disk reads and Enable caching of disk writes
- Click Apply and OK
Fix 3. Reinstall and/or update your network adapter drivers
SYSTEM_THREAD_EXCEPTION_NOT_HANDLED (NETIO.SYS) or DRIVER_IRQL_NOT_LESS_OR_EQUAL (NETIO.SYS) error is said to be triggered by netio.sys and drivers incompatibility. Therefore, you should try upgrading the drivers. For that, do the following:
- Right-click on the Start button and select Device Manager
- Expand Network adapters
- Right-click on your network adapter, and choose Update Driver
- Next, click on Search automatically for updated software
- Wait till Windows installs new updates and installs them automatically
- Reboot your PC
Fix 4: Clean install Windows
If all else fails, that may mean that there is a corrupt file in your Windows installation, and no matter what you uninstall and reinstall, you can’t really fix it permanently. Your last option is to perform a clean install of Windows 10, after which you can install all drivers and software manually and make sure that you don’t face the BSOD again.
Blue Screens of Death have started appearing very often, especially since the introduction of Windows 10. However, most of them are due to driver malfunction or incompatible software, and they can be easily fixed by taking care of the driver or software in question. The aforementioned methods describe how to do exactly that, so by following them you will get rid of the DRIVER_IRQL_NOT_LESS_OR_EQUAL (netio.sys) error.
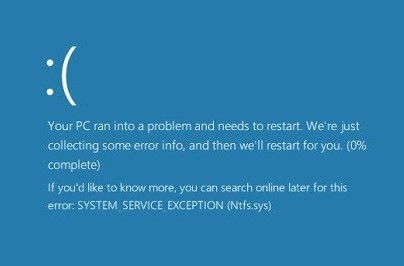
How to fix ” SYSTEM_SERVICE_EXCEPTION (ntfs.sys) ” error?
ntfs.sys is a system file, also known as the NT File System Driver of Windows. It’s present in a number of versions of Windows and can be found in the Drivers folder of Windows. As such, it shouldn’t be modified or deleted, as doing this can cause serious system instability.
The SYSTEM_SERVICE_EXCEPTION (ntfs.sys) can appear due to a number of reasons because ntfs.sys isn’t directly connected to anything. However, the most common causes for this problem include specific antivirus and security software, corrupt or outdated drivers, or bad or incorrectly setup RAM sticks.
Fix 1: Uninstall your antivirus
Antivirus software can be the cause of Windows problems more times than you can imagine. For Windows 10, specifically, software such as BitDefender and Webroot can cause anything from small problems to Blue Screens of Death. If you’re facing this issue and you find that you are using any of them, a solution with a very high chance to work would be to uninstall them and revert to Microsoft’s Windows Defender, which comes built into Windows 10.
From the Start menu, type Change or Remove Programs and open the result. You will be met with a list of software currently installed on your system.
Find your antivirus, select it, and choose Uninstall. Follow the wizard to uninstall it, and reboot your system to completely remove all remaining files. After this, your device should be working without any issues or BSODs.
Fix 2: Check for malfunctioning drivers and update them
Corrupt or outdated drivers are also the cause for a number of issues, such as this one. What you should do first is to check if any driver is malfunctioning, and then update all the drivers.
- Go to “Search”, type device manager, and choose “Device Manager” from the result. Then it opens with your computer name at the top and a list of devices that are installed on your computer beneath your computer name.
- Find and right-click the problematic device and choose “Properties”
- Click “Driver” and then choose “Update Driver”.
- Click “Search automatically for updated driver software”.
- Follow the wizard, which will update the controller for you. Reboot your device when done, and it should be working properly.
Fix 3: Check your RAM
The BSOD errors often caused by faulty hardware (such as RAM), therefore, it is highly recommended to check if your hardware works normally. If your hardware doesn’t work well, then you can try to replace it to get rid of the error. What you should do is boot the system with every RAM stick, one by one. If one of them is bad, you will notice it immediately as the system won’t boot, and you will know that you have to change that stick.
How to fix ” SYSTEM_SERVICE_EXCEPTION (rtkvhd64.sys) ” error?
rtkvhd64.sys is a Microsoft Windows system file associated with the Realtek Audio Driver. If deleted, it has been known to lead to issues such as no sound.
The SYSTEM_SERVICE_EXCEPTION (rtkvhd64.sys) error message that you get with a Blue Screen of Death will crash your computer. Since BSODs are usually associated with hardware and driver issues, you should know that this is no exception. You might get this error doing anything from watching a video or listening to music, to heavy gaming. It tells you that the Realtek audio device in your system has in some way malfunctioning. The error is known to appear for Windows 10 users, however, users of older versions of the OS aren’t excluded as well.
Fix 1: Check for malfunctioning drivers and update them
Corrupt or outdated drivers are also the cause for a number of issues, such as this one. What you should do first is to check if any driver is malfunctioning, and then update all the drivers.
- Go to “Search”, type device manager, and choose “Device Manager” from the result. Then it opens with your computer name at the top and a list of devices that are installed on your computer beneath your computer name.
- Find and right-click the problematic device and choose “Properties”
- In the window that opens, you will be presented with a list of devices currently installed. Locate your sound card under Sound, video, and game controllers.
- Click “Driver” and then choose “Update Driver”.
- Click “Search automatically for updated driver software”.
- Follow the wizard, which will update the controller for you. Reboot your device when done, and it should be working properly.
Fix 2: Completely uninstall the drivers and use the generic ones
- Go to “Search”, type device manager, and choose “Device Manager” from the result. Then it opens with your computer name at the top and a list of devices that are installed on your computer beneath your computer name.
- Find and right-click the problematic device and choose “Properties”
- In the window that opens, you will be presented with a list of devices currently installed. Locate your sound card under Sound, video, and game controllers.
- Click “Driver” and then choose “Uninstall Driver”.
- Follow the wizard, which will update the controller for you. Reboot your device when done, and it should be working properly.
Fix 3: After uninstalling, manually install the drivers
If the second method didn’t help either, or you don’t have sound at all, you should manually install the drivers for your sound card. If you have a laptop, you can download it from the manufacturer’s website. Make sure to reboot your system in the end.
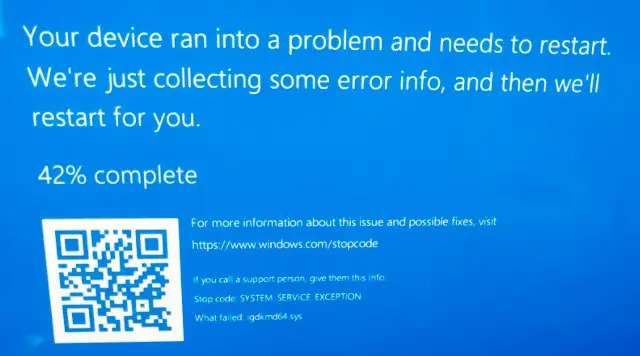
How to fix ” SYSTEM_SERVICE_EXCEPTION (igdkmd64.sys) ” error?
igdkmd64.sys is a Windows driver, and it’s known as the Intel Graphics Kernel Mode Driver, or igfx. It belongs to the Intel Graphics Accelerator Drivers software for Windows, made by Intel and used and needed by anyone with an Intel processor in their system.
The obvious conclusion is that if you’re facing this error, along with a Blue Screen of Death, is that there is something wrong with the integrated graphics card, or its drivers. While drivers are known to cause this sort of problem more often than they should, it is also true that you may face this issue due to problems with specific software on your system.
Fix 1: Check if you have ZoneAlarm or Lucidlogix Virtu MVP GPU, and uninstall them
From all the possible pieces of software you may have installed on your machine, these two have been known to cause a BSOD with an error message blaming Intel’s drivers for the crash.
- Click the Start button (lower-left corner) – Control Panel – Add/Remove Programs (Windows 7, XP).
- Right-click on Windows icon (lower-left corner) – Control Panel – Uninstall a Program under Programs (Windows 8/10).
- Find the one in question (ZoneAlarm, or Lucidlogix Virtu MVP GPU), click on it and click the Uninstall button. Follow the uninstall wizard until you have removed the software
- Reboot the device.
For ZoneAlarm, however, since it is antivirus it isn’t advisable to leave your system without any protection, so we will also outline how to install Windows Security Essentials, or enable Windows Defender (depending on the version of your OS).
For users of Windows 7, you can head to Microsoft’s Website and download Microsoft Security Essentials, which will protect your system. If you have Windows 8 and above, it comes with Windows Defender, which you simply have to turn on, since it turns itself off when another antivirus software is installed. You can do this by pressing the Windows key on your keyboard, typing Windows Defender and opening the result.
Once the Windows Defender window opens, click the Turn On button to enable it. Close the window and reboot your system.
Fix 2: Install Latest Windows Update
- Press the Win + I keys at the same time to open Settings and then choose Update & Security.
- Click Windows Update and then choose to Check for updates on the right panel.
- If your system is not up to date, Windows will start to download updates automatically.
- Reboot your computer to finish updating your system.
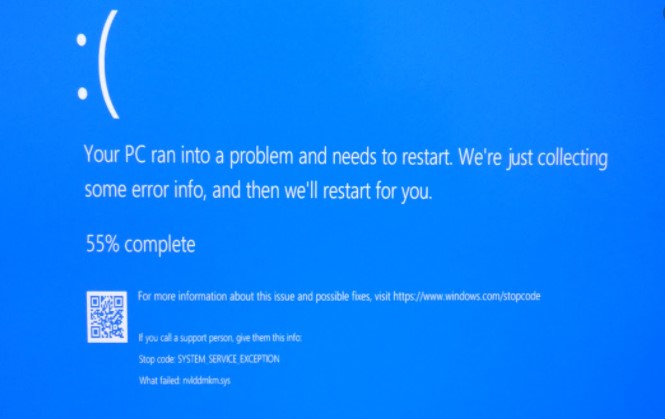
How to fix ” SYSTEM_SERVICE_EXCEPTION (nvlddmkm.sys) ” error?
nvlddmkm.sys is the Nvidia driver for Windows. It helps your graphics card interact with the operating system and is an essential Windows file. Even though it is known to cause issues, it should not be deleted or modified in any way.
Fix 1: Update/reinstall your graphics card drivers
- Go to “Search”, type device manager, and choose “Device Manager” from the result. Then it opens with your computer name at the top and a list of devices that are installed on your computer beneath your computer name.
- Find and right-click the problematic device and choose “Properties”.
- Once inside, expand Display Drivers, and locate your Nvidia graphics card. Right-click it, and select Update Driver Software from the dropdown menu.
- Follow the wizard that will download and install the latest available drivers. Reboot your system when you’re done.
Fix 2: Completely remove the drivers and download new ones from Nvidia’s website
- Go to “Search”, type device manager, and choose “Device Manager” from the result. Then it opens with your computer name at the top and a list of devices that are installed on your computer beneath your computer name.
- Find and right-click the problematic device and choose “Properties”.
- Once inside, expand Display Drivers, and locate your Nvidia graphics card. Right-click it, and select Uninstall from the dropdown menu.
- Follow the wizard and uninstall the drivers. Reboot your system when you’re done.
- Once your system is back on, head to Nvidia’s Site and select the appropriate product, operating system, and language from the dropdown menus, then click Search.
- When you’ve found the driver, download it and install it using the setup wizard. Reboot your system again for the changes to take effect. When all this is done, you shouldn’t be facing any issues.
Fix 3: Check for incompatible software, such as Xsplit and MSI Live Update
- Click the Start button (lower-left corner) – Control Panel – Add/Remove Programs (Windows 7, XP).
- Right-click on Windows icon (lower-left corner) – Control Panel – Uninstall a Program under Programs (Windows 8/10).
- Find the one in question (Xsplit and MSI Live Update), click on it, and click the Uninstall button. Follow the uninstall wizard until you have removed the software
- Reboot the device.
How to fix “SYSTEM_SERVICE_EXCEPTION (win32kfull.sys) (cldflt.sys) (ntoskrnl.exe) ” errors ?
The following guide can be applied for all the errors: (win32kfull.sys) (cldflt.sys) (ntoskrnl.exe)
Fix 1: Try updating all the Drivers
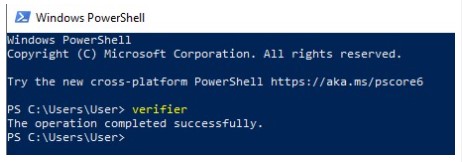
- Press Windows + X key.
- From the options, select Windows PowerShell.
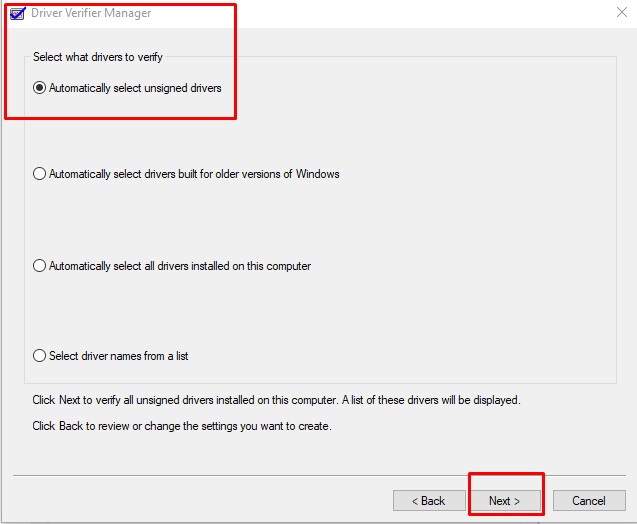
- Type verifier in the elevated PowerShell screen and hit enter, a message will be displayed that says ‘The operation completed successfully’, and the “Driver verifier Manager” will be launched.
- When launched, select the option ‘Create standard settings’ and click Next.
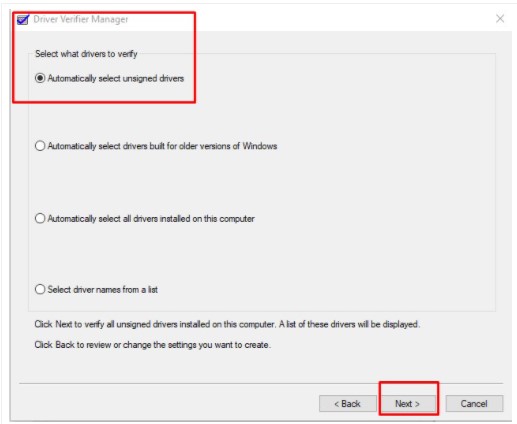
- Now you choose the option ‘Automatically select all drivers installed on this computer’, then click on Next
- After following the steps above, Windows will scan and search errors in all your drivers. After scanning, your PC will restart and if there are drivers with a problem, they’ll be displayed. You have to fix these errors by yourself, most of the time updating the driver will fix the problem and if after updating, didn’t still work, you can remove the driver and install it again.
Fix 2: Check your Registry for damaged files.
Step 1: Open System File Checker
- Type Command Prompt in the search bar of Windows 10.
- Select the best-matched one and choose Run as administrator.
Step 2: Type the command
- In the pop-up window, type the command sfc /scannow and hit Enter to continue.
- Please do not close the window until you see the message Verification 100% complete
- When the process is finished, you can reboot your computer and check whether the error is still present
Fix 3: Check for Faulty Hardware ( RAM or Video Card)
The BSOD errors often caused by faulty hardware (such as RAM, Video Card, and motherboard), therefore, it is highly recommended to check if your hardware works normally. If your hardware doesn’t work well, then you can try to replace it to get rid of the error. What you should do is boot the system with every RAM stick, one by one. If one of them is bad, you will notice it immediately as the system won’t boot, and you will know that you have to change that stick.
Fix 4: Run the built-in Windows Memory Diagnostic tool
This will test your RAM to see if there is anything wrong with it. To do this, do the following:
- Type “memory diagnostic” into your computer’s search box and click on the application that pops up with the name, Windows Memory Diagnostic
2. You will be provided with two options. Use the first option to have the application restart your computer and run a scan on the RAM.
3. If it comes back with an error, check to make sure that your RAM is installed properly. If it is, consider replacing it.
4. In case you get no errors, the problem is being caused by something else.
Fix 5: Install Latest Windows Update
- Press the Win + I keys at the same time to open Settings and then choose Update & Security.
- Click Windows Update and then choose to Check for updates on the right panel.
- If your system is not up to date, Windows will start to download updates automatically.
- Reboot your computer to finish updating your system.
Conclusions:
Dear followers of Get IT Solutions, SYSTEM_SERVICE_EXCEPTION is one of the Windows 10 errors that often show Blue Screen of Death (BSoD) and cause PC crashes and freezes. In our step-by-step tutorial, we have provided all the possible solutions for you to fix it. We hope you will find this method helpful. Have you managed to solve it? Please let us know in the comments below.
